Detail Author:
- Name : Mr. Luigi Yundt I
- Username : eleanore.powlowski
- Email : dina.walker@yahoo.com
- Birthdate : 1980-10-02
- Address : 3021 Stiedemann Place Apt. 291 Charleneville, OR 60315
- Phone : 1-580-253-2186
- Company : Jacobi, Brown and Bauch
- Job : Sports Book Writer
- Bio : Beatae reiciendis mollitia excepturi quis atque. Reprehenderit fugiat velit quis consequuntur et eum laudantium voluptate.
Socials
instagram:
- url : https://instagram.com/kenna4490
- username : kenna4490
- bio : Omnis vero quis qui minima dolores numquam odio. Earum provident impedit qui voluptatibus ratione.
- followers : 5007
- following : 1918
tiktok:
- url : https://tiktok.com/@klittle
- username : klittle
- bio : Quia quo vitae nostrum velit.
- followers : 2799
- following : 1728
Imagine you have a small, powerful computer like a Raspberry Pi humming away at home, maybe running a smart home system, a personal cloud, or a media server. You are out and about, perhaps on a trip, and suddenly, you need to get to a file on your Pi. Or, you want to check on a sensor reading, or perhaps even start a program. That, you know, is where the idea of remote access becomes a really big deal. People often wonder if they can truly get to their Raspberry Pi from anywhere in the world, and what is more, do it without spending a penny.
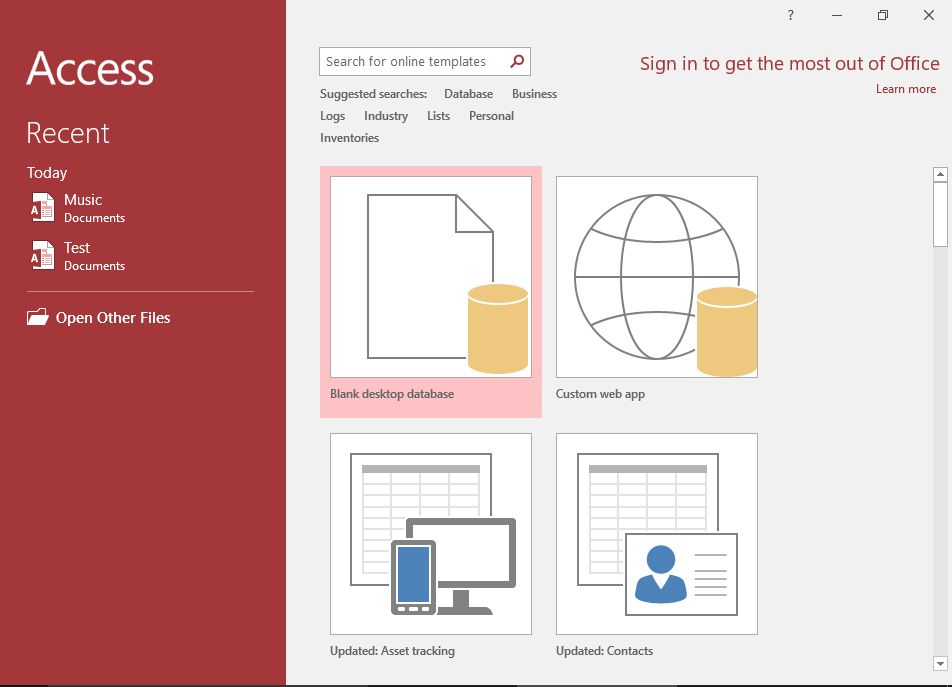
This idea of reaching out and controlling something far away is a bit like how Microsoft Access helps you handle information. With Access, you can quickly create desktop databases and customizable database apps. It lets you build a database without writing code or being a database expert, so you can easily find just the data you want. In a very similar way, gaining control of your Raspberry Pi from a distance means you can easily get to your own data or projects. It is about making your little computer work for you, no matter where you happen to be.
Today, we are going to look at some clever ways to achieve this, giving you that freedom to connect. We will explore how to truly **access Raspberry Pi over the internet free**, letting you tap into its abilities from nearly any spot on the globe. This opens up so many possibilities for your projects, making them even more useful and convenient. You will see that getting to your Pi remotely is not as hard as it might seem, and you can certainly do it without paying for extra services.
Table of Contents
- Understanding the Challenge of Remote Pi Access
- Why Free Access Matters for Your Raspberry Pi
- Method 1: SSH and Port Forwarding (With Cautions)
- Method 2: Virtual Private Networks (VPNs)
- Method 3: Cloud-Based Tunneling Services
- Method 4: VNC for Graphical Control
- Important Security Considerations
- Frequently Asked Questions
Understanding the Challenge of Remote Pi Access
Getting to your Raspberry Pi from outside your home network can be a bit tricky, you know, because of how home networks are usually set up. Most home internet connections give you what is called a "private IP address" within your house. Your router then shares one "public IP address" with the whole internet. This public address is how the outside world sees your home network. So, the challenge, in a way, is telling your router that traffic coming in for your Pi should go to your Pi, and not just get blocked or sent somewhere else.
It is a bit like trying to send a letter to a specific person inside a large apartment building. You have the building's address, but you also need the apartment number. Your router is the building manager, and it needs to know which "apartment" (your Raspberry Pi's private IP address) to send the incoming requests to. This is where things like port forwarding come into play, or maybe even creating a secure tunnel right through that router. It is all about making sure the right data gets to the right device.
Sometimes, your public IP address can change, too. This is called a "dynamic IP." If it changes, your remote connection might break because the internet no longer knows where your home network is. This is a problem many people face when trying to **access Raspberry Pi over the internet free**. Luckily, there are ways to deal with this, which we will definitely explore.
Why Free Access Matters for Your Raspberry Pi
For many Raspberry Pi enthusiasts, keeping costs down is a big part of the appeal. The Pi itself is an affordable computer, and it makes sense to look for free ways to extend its usefulness. Why pay for a service if you can achieve the same thing with a bit of setup and some clever, free tools? This is particularly true for hobbyists, students, or anyone who just wants to experiment without a big budget. It is about getting the most out of your little device.
Using free methods to **access Raspberry Pi over the internet free** also gives you a lot of freedom. You are not tied to a subscription, and you often have more control over the setup. This can be quite empowering, knowing you have built the connection yourself. Plus, learning how these free solutions work really helps you understand networking better. It is a very practical skill, honestly, that can be useful for many other tech projects.
Think about it like this: Microsoft Access is good for organization, storage, and retrieval of your information. It allows anyone to easily create, edit, and maintain a database of information without being a developer. Similarly, free remote access tools let you organize, store, and retrieve data from your Pi, without needing to be a network engineer. It is about making powerful tools accessible to everyone. The goal is always to make things easier for you, so you can manage your projects or data effectively, no matter the distance.
Method 1: SSH and Port Forwarding (With Cautions)
SSH, which stands for Secure Shell, is a really common way to connect to your Raspberry Pi. It gives you a command-line interface, letting you run commands as if you were sitting right in front of the Pi. To use SSH from outside your home, you will typically need to set up something called "port forwarding" on your router. This tells your router to send incoming SSH requests directly to your Pi. This is one of the most direct ways to **access Raspberry Pi over the internet free**, though it does come with some security considerations.
Setting Up SSH on Your Pi
First, you need to make sure SSH is turned on on your Raspberry Pi. If you are using Raspberry Pi OS, it is often disabled by default for security. You can enable it using the `raspi-config` tool. Just open a terminal on your Pi and type `sudo raspi-config`. Go to "Interface Options," then "SSH," and choose to enable it. It is a pretty straightforward process, actually.
After enabling SSH, you should change the default password for the 'pi' user, or even better, set up SSH key-based authentication. This makes your connection much more secure. Just relying on a password can be risky, especially when you are opening up your Pi to the internet. This step is, you know, quite important for keeping your system safe.
You will also need to know your Raspberry Pi's local IP address. You can find this by typing `hostname -I` in the Pi's terminal. It will usually look something like `192.168.1.X`. This local address is what your router will use to send traffic to your Pi.
Router Configuration for Port Forwarding
This part can vary a lot depending on your router's brand and model. You need to log into your router's administration page, which you can usually do by typing its IP address (often `192.168.1.1` or `192.168.0.1`) into a web browser. Look for a section called "Port Forwarding," "NAT," or "Virtual Servers."
Inside that section, you will create a new rule. You will specify an external port (often `22`, the default for SSH, but it is much safer to use a different, high-numbered port like `2222` or `50000` to avoid common scans). Then, you will map this to your Raspberry Pi's internal IP address and its internal SSH port, which is `22`. This tells your router, you know, to send anything coming in on that external port directly to your Pi.
For example, you might set up external port `50000` to forward to internal IP `192.168.1.100` (your Pi's address) on internal port `22`. When you connect from outside, you would then use your public IP address and port `50000`. This setup, while effective, does mean your Pi is directly exposed to the internet, which is why security is so important here.
Dynamic DNS for a Moving Target
As mentioned, your home's public IP address might change. This is where Dynamic DNS (DDNS) services come in handy. Services like DuckDNS or No-IP offer free accounts that let you create a memorable hostname (like `myraspberrpi.duckdns.org`). You then install a small client on your Raspberry Pi or configure your router to update this service whenever your public IP address changes.
This way, you do not have to keep track of a changing IP address. You just use your chosen hostname, and the DDNS service makes sure it always points to your current home network. It is a really convenient way to maintain a consistent connection, so you can always find your Pi. This helps you to **access Raspberry Pi over the internet free** even with a dynamic IP.
Method 2: Virtual Private Networks (VPNs)
Using a VPN is often considered a more secure way to **access Raspberry Pi over the internet free** compared to direct port forwarding. A VPN creates a secure, encrypted tunnel between your remote device and your home network. It is like having your remote device physically connected to your home network, even if it is miles away. This means all your traffic is private, and your Pi is not directly exposed to the internet.
Using a Personal VPN Server on Your Pi
You can turn your Raspberry Pi into your own personal VPN server. Popular choices for this include WireGuard or OpenVPN. Setting up a VPN server on your Pi involves installing the necessary software, configuring it, and then setting up client software on the devices you want to connect from (your laptop, phone, etc.). This gives you full control over your VPN.
For example, setting up WireGuard on a Raspberry Pi is relatively straightforward with good guides available online. Once it is running, you just need to forward one single port on your router for the VPN traffic, which is much safer than forwarding multiple ports. Then, when you connect your phone to your Pi's VPN, your phone effectively becomes part of your home network, and you can access your Pi's local IP address directly via SSH or VNC. This is a very secure and free approach, you know, for remote access.
Popular Free VPN Options (and their limits)
While you can set up your own VPN server, some people might consider using free commercial VPN services. However, these are generally not suitable for accessing your home network. They are designed to let *your device* connect *out* to the internet securely, not to allow *you* to connect *into* your home network. Plus, free commercial VPNs often come with data limits, speed restrictions, or privacy concerns. For **access Raspberry Pi over the internet free**, building your own VPN server on the Pi itself is the way to go.
Method 3: Cloud-Based Tunneling Services
Cloud-based tunneling services offer a fantastic way to **access Raspberry Pi over the internet free** without the need for port forwarding or even a static IP address. These services work by creating a secure tunnel from your Raspberry Pi to their cloud server. Then, when you want to connect, you connect to their cloud server, and it routes your request through the tunnel to your Pi. It is a very clever solution for getting around router limitations.
These services are a bit like having a global network of "Access" points, where "Access" as a company has a global reach with subsidiary companies and affiliated companies in Japan, Seoul, Taiwan, Europe, U.S.A., and India. Just as that company helps you get what you need from various locations, these tunneling services help you reach your Pi from anywhere. They simplify the process immensely.
Ngrok: A Quick Tunnel
Ngrok is a popular choice for quickly exposing a local service on your Raspberry Pi to the internet. You install the Ngrok client on your Pi, and then you can tell it to create a tunnel for a specific port, like SSH (port 22). Ngrok gives you a unique public URL (e.g., `http://randomstring.ngrok.io`) that you can use to access your Pi.
The free tier of Ngrok has some limitations, like random URLs that change each time you start the tunnel, and session limits. But for quick tests or temporary access, it is incredibly useful. It is very simple to set up, you know, and gets you connected fast.
ZeroTier and Tailscale: Virtual Networks
ZeroTier and Tailscale are fantastic services that create a "virtual local area network" across the internet. You install their client software on your Raspberry Pi and on all the devices you want to connect from. Then, you join all these devices to a single virtual network. Each device gets a unique virtual IP address within this network.
Once connected, you can access your Raspberry Pi using its virtual IP address, just as if it were on your home network. No port forwarding is needed, and it works even if your Pi is behind a tricky router or has a dynamic IP. Both offer generous free tiers that are usually more than enough for personal use. They are very secure, too, with strong encryption built-in. This is a very modern and reliable way to **access Raspberry Pi over the internet free**.
Remote.it: For Device Connection
Remote.it is another service that allows you to connect to your devices without port forwarding. It focuses on making it easy to create secure, peer-to-peer connections to services running on your Raspberry Pi, like SSH, VNC, or web servers. You install their agent on your Pi, register your device, and then use their client software or web portal to connect.
Remote.it offers a free plan that is quite suitable for individual users and a few devices. It is designed to be very user-friendly, abstracting away much of the underlying network complexity. This makes it a great choice for those who want a simpler approach to **access Raspberry Pi over the internet free**. It really simplifies things, you know, for people who are not network experts.
Method 4: VNC for Graphical Control
While SSH gives you a command-line interface, sometimes you need to see your Raspberry Pi's desktop environment. This is where VNC (Virtual Network Computing) comes in. VNC allows you to view and control your Pi's graphical desktop remotely, as if you were sitting right in front of it with a monitor, keyboard, and mouse. It is a really visual way to interact with your Pi.
Installing VNC Server on Your Pi
The most popular VNC server for Raspberry Pi is RealVNC Connect (VNC Server). It is often pre-installed or easily installed on Raspberry Pi OS. You can enable it through `raspi-config` just like SSH, or install it with `sudo apt install realvnc-vnc-server`. After installation, you will need to enable it and set up a password for VNC connections. This password is separate from your Pi's login password, so, you know, keep that in mind.
Connecting with VNC Viewer
To connect to your Pi's VNC server, you will need a VNC Viewer application on your remote device. RealVNC offers a free VNC Viewer app for various platforms, including Windows, macOS, Linux, Android, and iOS. If you have set up port forwarding for VNC (usually port 5900), you would connect using your public IP address and the VNC port.
However, for a more secure and easier setup, it is highly recommended to tunnel your VNC connection through an SSH tunnel or use one of the cloud-based tunneling services like ZeroTier or Tailscale. This means you are not directly exposing your VNC port to the internet, which is much safer. For instance, you could establish a ZeroTier connection first, then use your Pi's ZeroTier IP address in the VNC Viewer. This is a much better way to **access Raspberry Pi over the internet free** with a graphical interface.
Important Security Considerations
When you open your Raspberry Pi to the internet, even with free methods, security becomes very important. Think of it like managing sensitive information with Microsoft Access. You would want to protect your databases, right? Similarly, you need to protect your Pi.
Always use strong, unique passwords. Avoid default usernames and passwords. If you use SSH, consider setting up SSH key-based authentication instead of just passwords. This is much more secure. You should also keep your Raspberry Pi's software up to date by regularly running `sudo apt update` and `sudo apt upgrade`. This helps patch any security vulnerabilities.
If you are using port forwarding, only forward the absolute minimum number of ports you need. Using services like ZeroTier or Tailscale is generally more secure because they do not require opening ports on your router. They create encrypted tunnels, which reduces your exposure to direct internet threats. It is all about minimizing risk, you know, and keeping your little computer safe from unwanted attention.
Another thing to consider is a firewall on your Raspberry Pi, like `ufw` (Uncomplicated Firewall). This can help control what traffic is allowed in and out of your Pi. Setting up a firewall adds another layer of protection. Remember, your goal is to **access Raspberry Pi over
![Microsoft Підручник з Access: MS Access із прикладом [Прості нотатки]](https://www.guru99.com/images/1/041519_1116_MSACCESSTut5.png)
